
One thing I’ve noticed about myself since I started sewing is that I tend to take more risks fashion-wise when I’m making something versus buying it in a store. I always appreciate every facet of fashion (OK, maybe not always, but often) but I used to be wary if certain things would suit me.
I never thought I would ever wear culottes out of the house, but here I am rocking it – and all because the sewing community gave me the confidence I needed!
Now I’m trying out the faux fur vest. It’s been on my to-sew list for about a year, but I was too slow last winter to actually make one and by the time I was ready, I couldn’t bear to think of working with fur when it was blazing hot outside!
I bought some beautiful white faux fur at SAS last year. It’s really bulky and it took up a lot of space in my stash, so I decided to sew with it first.

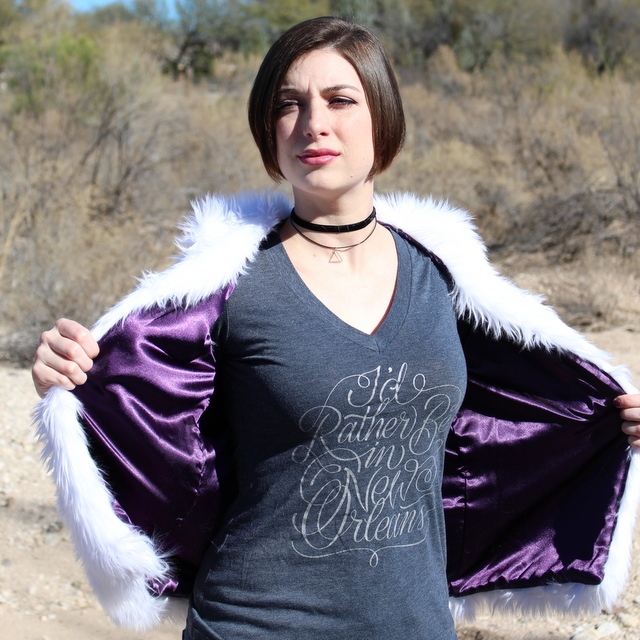
I feel like a beautiful polar bear princess in it!
I was searching for a good fur vest pattern for a while, and I was excited to see Simplicity come out with the 8219 lined faux fur pattern. I didn’t feel like figuring out how to line it myself so I’m happy Simplicity took all the guesswork out for me.
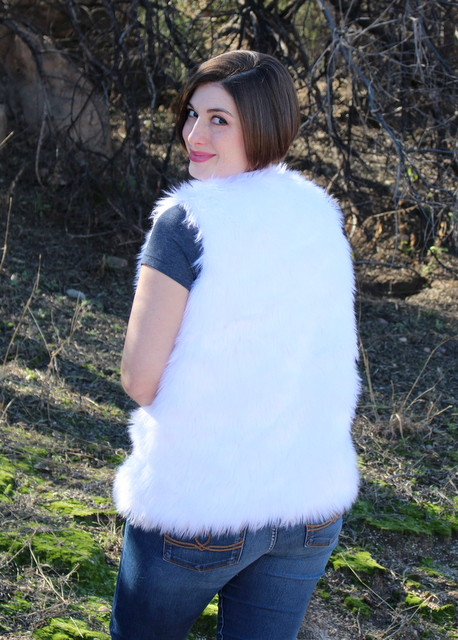
I sewed the length of View B and didn’t add any closures. I also graded from a size XS on top to a S at the waist/hips. I’m not a tiny lady, so I’m wondering how a more petite person would be able to fit this to their frame if I’m taking up some of the smaller sizes. Oh, Big 4, your sizing still makes me scratch my head!
This was my first time handling faux fur and it’s really not as difficult as one would think. It’s definitely as messy as one would think, though!
Since I bought the fur at a mill end store, it wasn’t exactly in pristine shape. There was a certain… smell… to it and there was a stain on the wrong side. I ended up hand-washing the whole thing in my bathtub with mild detergent and let it hang dry. That took FOR. EV. ER. But it smells nice and is so soft now! Totally worth the labor.
When it came time to cut the fabric to the pattern, I remembered reading something online about tracing the pattern piece on the wrong side of the fur.
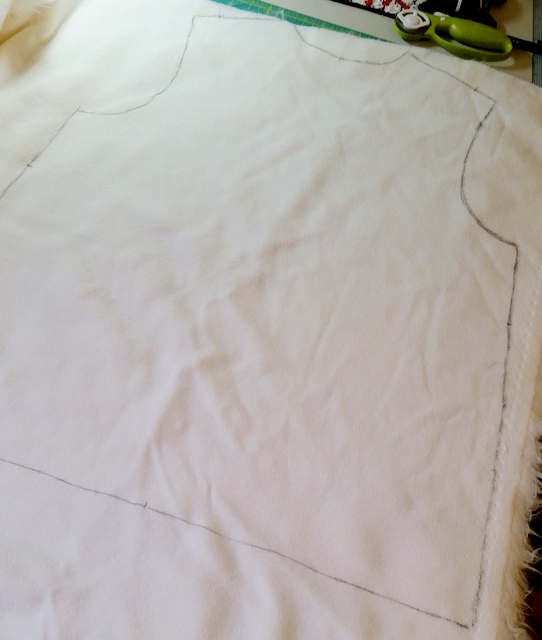
I took a plain black marker and went to town. It really helped since I couldn’t imagine pinning the toilet tissue paper to that beast of a fabric (quite literally) and cutting it without totally shredding the pattern pieces. One thing to note is when you cut out the pieces, do NOT use a rotary cutter! Especially on fur this long! Use fabric scissors and slide them through the fur to cut the backing instead of cutting the backing and fur together. This will create less of a mess!
The pattern suggests trimming the fur off the seam allowances (or 3/8 inch in on a 5/8 inch seam allowance) to make sewing easier. It also makes the seams less bulky. But that was probably the messiest part of the process! I had my vacuum cleaner ready but the fur still got in my nose and mouth (how?!) and I’m sure there’s chunks hiding from me somewhere in my sewing room.
After all the prep, it’s a pretty quick sew even with the lining. I didn’t have to change my sewing machine foot while sewing the fur, amazingly enough. I just had my foot tension set at 3 so the fur wouldn’t get pushed all over the place.
Did I mention that I am super stoked that this pattern has POCKETS?!
Pockets make everything better, right? Here’s a close-up of the lovely purple pockets:
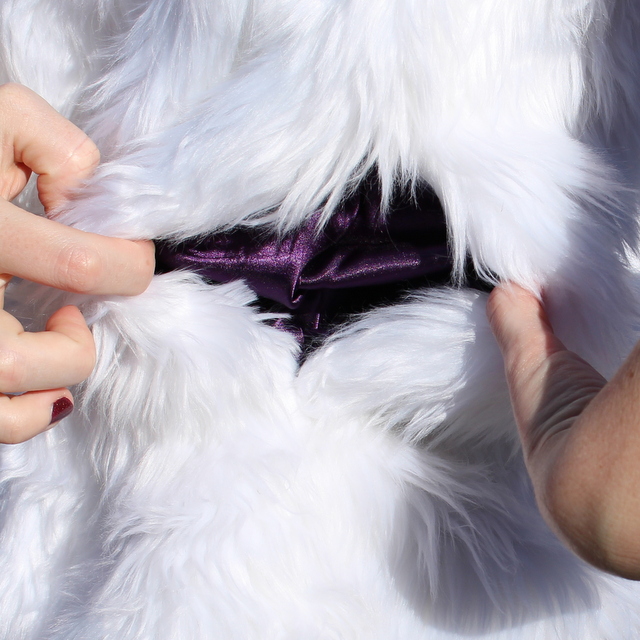
…OK maybe it looks like I’m ripping an animal apart…
At least I didn’t use red fabric! The purple fabric is actually a satin I bought from SAS to use during my DIY wedding madness. I used this purple for my bouquet and ring pillow and still had a good yard + left over. I am so glad I had leftovers because look at how beautiful it is for the lining!
Reminder to self: Bring sunglasses when posing at high noon in the desert.
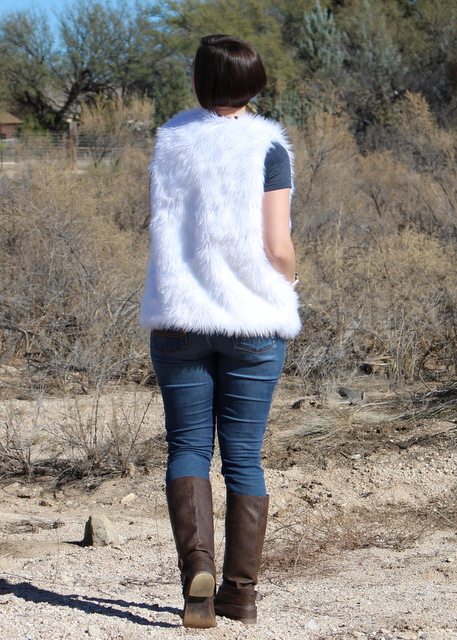
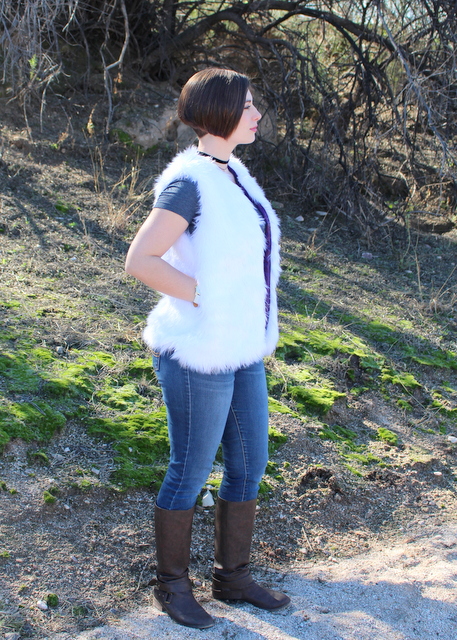
I am super happy with how this came out, even though it makes me look a little fluffy. It is so soft both inside and out that it seriously feels like I have my cats wrapped all over me. I might just have to live in this thing.

And just for good measure – here’s me tapping into my “Polar Bear Princess” vibe:

Not only was I feeling the faux fur vibe so much that I made one for myself…. I had to make another one!

I bought this Nicole Miller designer fabric at Joann’s on sale for $20/yard (yikes!). I got only one yard because I knew it would end up being a cropped fur vest. I used View C without closures or pockets.

I instantly fell in love with this fabric when I saw it. It’s an amazingly soft short silvery faux fur on one side and faux leather on the other. I figured it would be a super fast and easy sew since I wouldn’t have to line it.
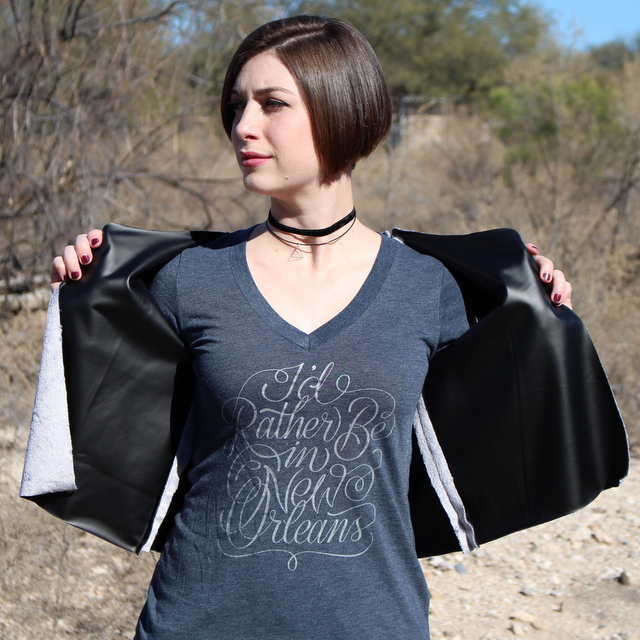
DD said, “It looks unfinished” and it technically is. I had this grand idea that I could just cut out the pattern pieces and sew the shoulder and side seams and have this instantly gorgeous vest. I also forgot that seam allowances were included in the pattern pieces, so I had to go back and trim 5/8 inch away from the edges. Maybe the unlined look doesn’t translate well because the ends kind of curl in. :-\

… but look at how pretty the fur is!
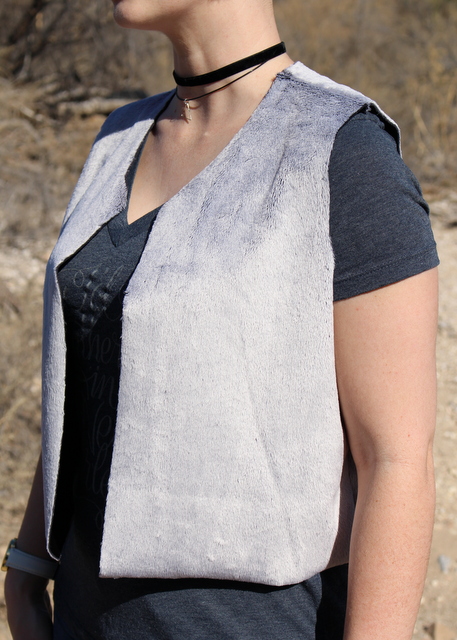
*Swoon!*

It took me a minute to figure out how to get this fabric through my machine. The faux leather stuck to my normal foot, so I tried putting Scotch tape on the bottom of the foot to let it slide across the faux leather better. Well, that didn’t work. So I busted out my trusty walking foot and that did the trick!
 I’m wondering how else to style this vest. I think it might look good with a long, flowy bohemian dress – which I don’t have. Hmmm. How would you wear it?
 And of course no Sew RED-y post would be complete without more jumping photos. 😉
That’s pretty much a wrap here! Have you jumped on the faux fur trend? Is it even still trendy???
-RED

I want to sew a faux fur vest!! I’m totally adding that to my list. Both vests look amazing, and the purple lining is perfect. Thanks for posting, it made my morning! I always love reading your posts because I always end up laughing.
LikeLiked by 1 person
Thank you! You would totally rock a faux fur vest – I can’t wait to see what you make!
I’m so glad you enjoy reading my posts. I always enjoy reading yours and learning about new products and especially Yoga with Adriene! I’m still going strong on the #yogarevolution. Are you still doing it?
LikeLike
Faux fur is trendy. A fellow office assistant in my office (much younger) was just wearing a faux fur vest. Your’s is lovely!
LikeLiked by 1 person
Thank you! I still need to muster up the courage to wear mine in the office. It shall happen one day! 😉
LikeLiked by 1 person
Faux fur is definitely trendy–and warm! I kept waiting for yeti eyes to pop out of the pockets. Your assessment of the big 4 is precisely why I don’t sew from their patterns. Why spend 4 hours making a pattern right when I can pick up a Euro pattern and trace off a reliable size for myself in about 30 minutes? Nobody tells you that that pattern you picked up for 99 cents will give you that much headache, yet 98% of my wadders have been from big 4. Speaking of, I totally have a pair of suede leggings for Fail February.
LikeLiked by 1 person
Yeti eyes! LOL! Love it. 🙂
Yeah I don’t understand why the Big 4’s sizing is so off. I do find the Cynthia Rowley Simplicity patterns to be pretty true to size and a good fit. I still fall for those 99 cent sales but I have to say now the majority of my recent purchases are indie!
Suede leggings sound amazingly failtastic! I can’t wait to see them!
LikeLike
It looks great on you! I bought a beautiful faux fur last year during a trip to the states with every intention of making it into a skirt but it is still all wrapped up under the bed. It is one of those projects that I would either feel completely ridiculous in and thus would never wear, OR would fall head over heels in love with and I don’t know if I want to put all that time in to make it only to not wear it, ya know? My backup plan is giant fluffy pillows to hug while watching TV. I hate being so indecisive sometimes…..
LikeLiked by 1 person
Thank you! Furry pillows sound like a cool idea and so chic!
The skirt sounds cute but I think it would depend on the nap of the fur whether it could really work or not. I think a fur as long as my white one wouldn’t do too well as a skirt because the fur would probably get all matted from sitting on it and moving around all the time.
LikeLike
Hmmmm, I never thought of that. It is at least as long as your first vest. All I thought about was being able to pet the skirt all day at work (Like a temporary replacement for my dog? Can a therapy skirt be a thing now?). That sounds a bit weird when reading that out lol.
LikeLiked by 1 person
HAHA I totally understand! My employees and I were talking about getting a therapy dog at work. I should just bring in my vest!
LikeLiked by 1 person
The polar bear princess vest looks soooo snuggly. Have the fuzzy children thought you’ve grown fur and become more like them? I love that you added pockets! Why do pockets make every garment better?
LikeLiked by 1 person
Haha it is! I haven’t worn it around the house yet – just for my great-nephew’s 1st birthday party. It was camping themed so everyone was wearing flannel. I decided to go as the bear as I don’t have a flannel shirt yet. 😉
I’m sure if I snuggled Tasso in my vest he would think he would have died and gone to heaven. :3
LikeLiked by 1 person
They both look awesome, and you’d never guess they are the same pattern! Guess that is the great thing about faux fur, that each one is unique!
LikeLiked by 1 person
Thank you!
LikeLike
Hi, I love the 2 versions that you sew. They are awesome. I’m having some issues with mine though. I can not understand how to close the sides and the pockets are confusing me. Any ideas? I would totally appreciate your help. Love your blog! Thank s
LikeLiked by 1 person
Thank you so much!
I think I had the same issue when I was constructing the white one. I just pulled out the instructions to try to refresh my memory… it looks like step #9 might be the issue? I’m kind of scratching my head over it, too… but it looks like the armholes and bottom are all sewn up by then, so you kind of have this circular tube-thing happening on either side. You’ll keep the lining and the faux fur separate from each other and basically sew in a circle, having right sides of the lining together and right sides of the fur together. So one side of your “circle” is the lining fabric and the other side is the fur.
But keep in mind you won’t sew a full circle and close it off or else you won’t be able to flip the seam allowances/pockets to the inside and hide them… plus you would be sewing your pockets closed. So the instructions have you start sewing at the lining near the armpit and move into sewing the fur until you reach the dot you marked from the pattern near the top of the pocket. Back stitch there and move to the lower dot, under the pocket opening and continue to sew the faux fur, eventually sewing into the lining part of the “circle” again, but leave an opening maybe about the size of your hand in the lining… so you won’t be sewing back up into the armpit – you’ll be stopping at a middle rib. 😉
Then you’ll sew the pocket curved edges together to close them up and clip the seam allowance (without cutting into your stitch line).
From there, it looks like you just flip everything inside (pockets included) and you’ll hand-stitch the hand-sized hole you left closed so all the seams are enclosed and the pockets are hiding in between the lining and fur.
I really hope that made sense because I think I remember that’s how I did it! I found a tutorial online for a fur vest that doesn’t have pockets and the hem is sewn last, but at step #5, it may help visualize what I mean by the “circle”… you’ll just have to use your imagination that the bottom is attached in the tutorial.
http://two-many.blogspot.com/2013/12/make-faux-fur-vest.html
Please let me know if this helped or if I just made it more confusing. 🙂 But I do appreciate you checking out my blog and holla if you need anything else! ❤
LikeLike
Thank you do much for taking your time to understand this. You are AWESOME! I’ll share with you how it goes. 😉
LikeLiked by 1 person
No problem! Good luck and I can’t wait to hear the turnout. 🙂
LikeLike
Ok, thank u again for your help. I finished the vest. Unfortunately, it was too big!!. Even my husband tried it on and fit him!!!!! So, it’s in the closet til next September that I fix it!!! Anyway, just wanted to stop by and thank you for your help
LikeLiked by 1 person
Ohh sorry to hear it’s too big! I’m glad you finished it, though, and hopefully fixing it won’t be too much work. 😦 I find the commercial patterns run larger than they should sometimes.
I’m happy to help any time when I can! Thanks for getting back to me on your progress. 🙂
LikeLike